Cat
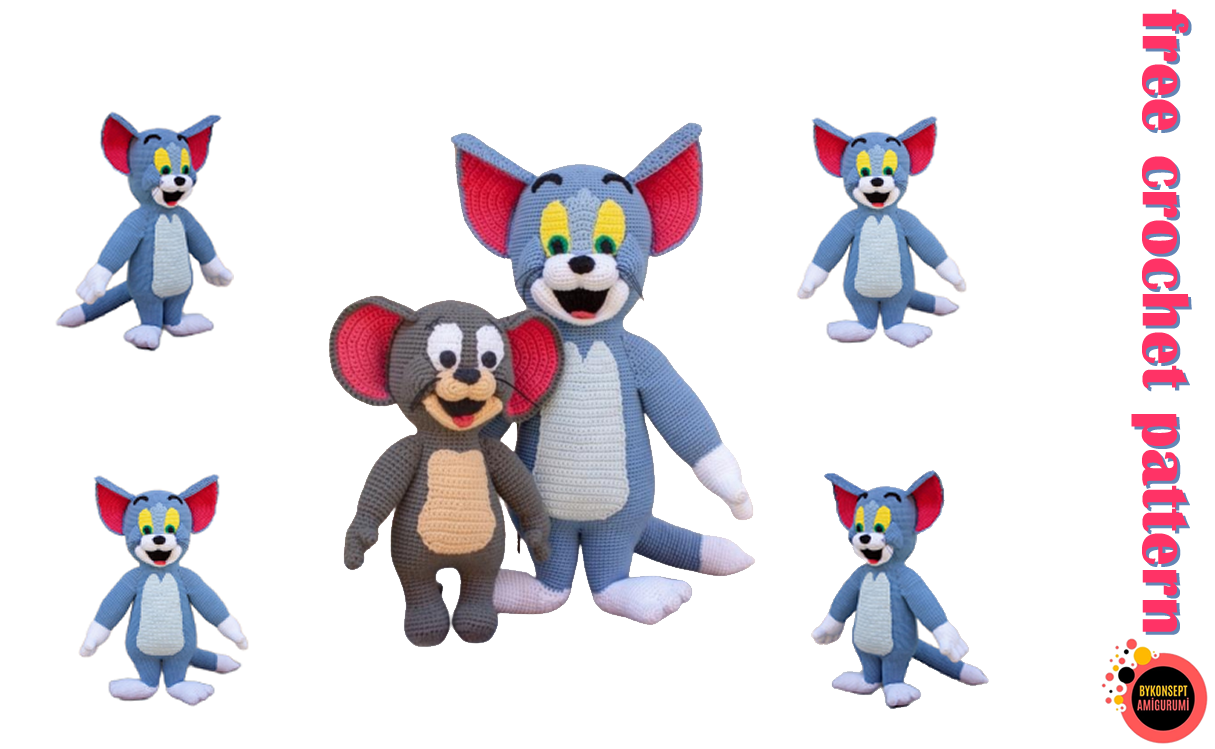
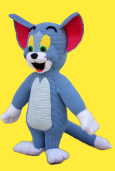
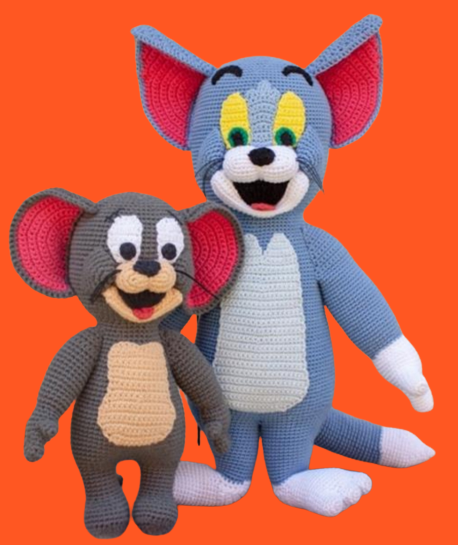
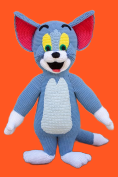
Hello dear amigurumi lovers, we share many amigurumi recipes with you in detail. The recipe we will share today will be the cat tom recipe.
It is really nice to knit amigurumi animal recipes. Cat tom is a model that you will enjoy knitting. Make sure your kids will have a good time when this cat tom pattern is finished. Cat tom may be different, but I can say this is the cutest.
Amigurumi cat tom also helps you instill a love of animals in your children.
Don’t forget to check out our other free recipes.


Material :
I used mercerized cotton yarn and a 2.5 mm hook.
For the main color you will need approx. 4-5 (50g) balls of cotton yarn, approx. 1.5 balls
white for the legs, arms, face, for the rest : > light blue for the tummy patch > pink for
the inner ears > a little black, green and yellow, 1–1 balls or less will be enough.
The cat is approx. 16.4 inch tall (41-42 cm).
Abbreviations:
If you need any help please don’t
hesitate to contact me :
bettibetti.ami@gmail.com
Sc – stitch
Inc – increase
Dec – decrease This pattern is for personal use, I ask
that you do not share it in any form
and on any platform.
However, you may sell the finished
product and if you don’t forget, you can
give credit to me, too.
Thank you!
Hdc – half double crochet
Dc – double crochet
( )* – repeat
Ch – chain
The pattern is written in English, with US crochet terminology.
Notes:
Stuffing: I used polyester filling. Many times I read “stuff as you go”, but sometimes it
does not work for me, because I always find and catch the stuffing material – and it
makes me crazy! So, when I see a part that needs stuffing or a part that is too small to
be stuffed later, I put the filling in immediately.
With some parts – eyes, ears, heel and shoulders – you will have to reverse the work.
With the eyes and ears, you will need a chain when you finish the row, then turn, but with
the shoulders you won’t, and you will skip the first stitch. But I will lead you through the
process.
How to sew on the following parts :
Belly patch, eyes and the face patch : I sew on it with back stiches
▫ BELLY PATCH ▫ – with light yarn
Chain 13, start from the 2nd chain and chain 1 in the end of every row.
1.) Inc, 10 sc, inc, turn (14) 29.) 8 sc, skip 1 and make
9 more sc, turn
(17)
2.) Inc, 12 sc, inc, turn (16) 30.-31.) 17 sc (2 rows)
3.) Inc, 14 sc, inc, turn (18) 32. ) 8 sc, skip 1 and make
8 more sc , turn
(16)
4.) Inc, 16 sc, inc, turn (20) 33.-36.) 16 sc (4 rows)
5.) Inc, 18 sc, inc, turn (22) Now comes the upper part of the belly patch:
6.-10) 22 sc (5 rows) 37. ) 8 sc, chain 1, turn
11.) Sc, skip 1, 18 sc, skip 1
and sc into the last, turn
(20) 38.) 7 sc, chain 1, turn
12.-17.) 20 sc (6 rows) 39.) 6 sc, chain 1, turn
18.) 9sc, skip 1 stitch and
make 10 more sc, turn
(19) 40.) 5 sc, chain 1, turn
19.-20.) 19 sc (2 rows) 41.) 4 sc, chain 1, turn
21.) 9 sc, skip 1 and make 9
more sc, turn
(18) 42.) 2sc, slst
22.-28.) 18 sc (7 rows) Repeat row 37-42 to make the other half of
the upper part
Cut the yarn, leave a looooong tail to sew.
I highly recommend you to sew it on the body before the head, it will be easier.
I placed the lower part of the patch in row 51
Now let`s begin with the toes, then the legs, body and finally the head.
▫ TOES AND LEGS ▫ – white color, make 2 sets of them- 3 on each leg
1.) MR with 6 sc (6) 14.-16.) 30 sc (3 rows)
2.) inc (12) 17.) 4 sc, ( dec, 8 sc ) * 2,
dec , 4 sc
(27)

3.-4) 12 sc (12) 18.) 27 sc (1 row)
Cut the yarn > make 2 like that but don’t cut
on the 3rd > you will join them together:
19.) Sc 13 more, and now you will
make the heel: turn without
chain at the end:
5.) Make 6 sc on the middle
toe, than 12 sc on the side
to, 6 sc on the middle and
12 sc
(36) – 17 sc , turn
– 16 sc, turn
– 15 sc, turn
– 14 sc, turn
– 13 sc, turn
– 12 sc, turn
– 11 sc, turn
– 10 sc
6.-10) 36 sc (5 rows)
11.) 5 sc, ( dec, 10 sc ) *2, dec,
5 sc
(33)
12.) 33 sc (1 row)
13.) (9 sc, dec )*3 (30)
You will leave the last stitches unworked in every
row
This is the last row of the heel, without 1 chain
stitch in the first, then 9 more sc
I saw some great tutorials on the internet: how to curve amigurumi.
Round 19, you will turn here after 13 sc and make
the heel
Round 28 – you will stitch the first sc there
28.) 4 sc on the side, 10 10 into
the front, 4 sc on the side
and 9 sc into the back
(27)
29.) 27 sc (1 row)
Change color: use the main color
30.) 27 sc (1 row)
Now the legs:
Right leg: Left leg:
31.) 13 sc, inc, 13sc (28) 31.) 4 sc, inc, 22 sc (28)
32.) 14 sc, inc, 13 sc (29) 32.) 4 sc, inc, 23 sc (29)
33.) 14 sc, inc, 14 sc (30) 33.) 5 sc, inc, 23 sc (30)
34.) 14 sc, inc, 15 sc (31) 34.) 6 sc, inc, 23 sc (31)
35.) 14 sc, inc, 16 sc (32) 35.) 7 sc, inc, 24 sc (32)
36.) 14 sc, inc, 17 sc (33) 36.) 7 sc, inc, 25 sc (33)
37.) 15 sc, inc, 17 sc (34) 37.) 7 sc, inc, 25 sc (34)
38.) 15 sc, inc, 18 sc (35) 38.) 8 sc, inc, 25 sc (35)
39.) 15 sc, inc, 19 sc (36) 39.) 9 sc, inc, 25 sc (36)
40.) 16 sc, inc, 19 sc (37) 40.) 10 sc, inc, 25 sc (37)
41.) 16 sc, inc, 20 sc (38) 41.) 11 sc, inc, 25 sc (38)
42.) 16 sc, inc, 21 sc (39) 42.) 12 sc, inc, 25 sc (39)
43.) 16 sc, inc, 22 sc (40) 43.) 13 sc, inc, 25 sc (40)
44.) 17 sc, inc, 22 sc (41) 44.) 14 sc, inc, 25 sc (41)
45.) 18 sc, inc, 22 sc (42) 45.) 15 sc, inc, 25 sc (42)
46.) 19 sc, inc, 22 sc (43) 46.) 16 sc, inc, 25 sc (43)
47.) 20 sc, inc, 22 sc (44) 47.) 17 sc, inc, 17 sc – now you will
join the two legs with 8 sc like
this:
37. sc with the 3rd sc from the
right leg
38.sc with the 2nd from the right

leg
39.sc with the 1st from the right
leg
40.sc with the 44th from the right
leg
41.sc with the 43rd from the right
leg
42.sc with the 42nd from the right
leg
43.sc with the 41st from the right
leg
44.sc with the 40th from the right
leg
(Pictures after the pattern)
FO the right leg.
Now you will continue with the ▫ BODY ▫
Important : you will have to stitch one
in the middle of the legs, front and back
to. If it is a bit difficult to stitch there,
stich into the first and last stitch, where
you joined the two legs. You have to
have 78 sc in round 48.
Pictures after the pattern.
48.) 8 sc, inc, 17 sc, inc, 18 sc,
inc, 17 sc, inc, 10 sc
(78)
49.) 6 sc , ( inc, 12 sc ) *5, inc, 6
sc
(84)
50.) 13 sc, inc, 12 sc, inc, 28 sc,
inc, 12 sc, inc, 15 sc
(88)
51.) 5 sc, ( inc, 10 sc )*7, inc, 5 sc (96)
52.-59.) 96 sc (8 rows )
60.) 11 sc, ( dec, 22 sc )*3, dec,
11 sc
(92)
61.-63.) 92 sc (3 rows)
64.) ( 21 sc, dec )*4 (88)
65.-67.) 88 sc (3 rows)
68.) 10 sc, ( dec, 20 sc )*3, dec,
10 sc
(84)
69.-73.) 84 sc (5 rows)
74.) ( 19 sc, dec )*4 (80)
75.-83.) 80 sc (9 rows)
84.) 9 sc, ( dec, 18 sc)*3, dec, 9
sc
(76)
85.-89.) 76 sc (5rows)
90.) ( 17 sc, dec )*4 (72)
91.) 72 sc (1 row)
92.) 8 sc, ( dec, 16 sc )*3, dec, 8
sc
(68) 109.) ( 29 sc, inc )*3 (93)
93.-94) 68 sc (2rows) 110.-
136.) 93 sc (27rows)
95.) ( 15 sc, dec )*4 (64) 137.) ( 29 sc, dec )*3 (90)
96.-97.) 64 sc (2 rows) 138.) ( 13 sc, dec )*6 (84)
98.) 7 sc, ( dec, 14 sc )*3, dec, 7
sc
(60) 139.) 6 sc, (dec, 12 sc )
*5, dec, 6 sc
(78)
99.) ( 13 sc, dec )*4 (56) 140.) (11 sc, dec )*6 (72)
100.) 6 sc, ( dec, 12 sc )*3, dec, 6
sc
(52) 141.) 5 sc, ( dec, 10 sc )
*5, dec, 5 sc
(66)
101.) ( 11 sc, dec )*4 (48) 142.) ( 9sc, dec ) * 6 (60)
… almost done, rest a little, eat something and get
ready for the ▫ HEAD ▫
143.) 4 sc, ( dec, 8 sc )
*5, dec, 4 sc


(54)
102.) ( 7 sc, inc ) *6 (54) 144.) ( 7 sc, dec )*6 (48)
103.) 4 sc, ( inc, 8 sc ) *5 , inc
, 4 sc
(60) 145.) 3 sc, ( dec, 6 sc )
*5, dec, 3 sc
(42)
104.) ( 9sc, inc ) * 6 (66) 146.) ( 5 sc, dec )*6 (36)
105.) 5 sc, ( inc, 10 sc ) *5,
inc, 5 sc
(72) 147.) 2 sc, ( dec, 4 sc )
*5, dec, 2 sc
(30)
106.) (11 sc, inc )*6 (78) 148.) ( 3 sc, dec )*6 (24)
107.) 6 sc, ( inc, 12 sc ) *5,
inc, 6 sc
(84) 149.) 1 sc, ( dec, 2 sc )
*5, dec, 1 sc
(18)
108.) ( 13 sc, inc )*6 (90) 150.) (sc, dec ) *6 (12)
I usually finish here, then with the yarn
needle, I insert the needle at every front
loop, pull the yarn tight and finish it. If
you need help to learn how to do this,
search videos for ‘How to finish
amigurumi’.
▫ FINGERS AND ARMS ▫
8 fingers (4 – 4 on each arm; first make 3. Don’t cut the yarn on the 4th, you will join
them together. Then comes the rest of the arm. Repeat this with the second arm)
Fingers :
1.) Magic ring with 6 sc (6)
2.) 6 *inc (12)
3.-8) 12 sc (6 rows)
Now you will join 3 fingers.
9.) 6 sc into the middle finger,
12 sc into the side, than 6
sc into the middle and 12
into the first finger
(36)
10.-11.) 36 sc (2 rows)
Now the thumb: Left hand: Right hand:
12.) 27 sc – here you are
joining the thumb – 6 sc in
both fingers, 3 sc
(36) 12.) 9 sc – here you are
joining the thumb –
6 sc in both fingers,
21sc
(36)
13.) 27 sc – here you are
joining the thumb – 6 sc in
both fingers, 3 sc
(36) 13.) 9 sc – here you are
joining the thumb –
6 sc in both fingers,
21sc
(36)
This picture shows how to join the thumb
and the hand together: first insert the
hook into the thumb, then into the hand
and pull the yarn through and make the
stich
Right hand
Here you can see the connected thumb.
You will skip the inner (row 11) stiches and
continue on the thumb to join it with the
hand.
Make that 6 sc and continue on the hand
with 21 sc.
14.-19.) 36 sc (6 rows )
20.) 2 sc , ( dec, 4 sc )*5,
dec, 2 sc
(30)
21.) ( 8sc, dec )*3 (27)
22.) 27 sc (1 row)
Change yarn to the main color
23.) 27 sc (1 row)
24.) 4 sc, ( inc, 8 sc )*2, inc,
4 sc
(30)
25.) ( 9 sc, inc ) *3 (33)
26.) 5 sc, ( inc, 10 sc )*2, inc,
5 sc
(36)
27.-32.) 36 sc (6 rows)
33.) Inc, 35 sc (37)
34.-48.) 37 sc (15 rows)
Now come the shoulders
You have to have 10 sc between the beginning
and the end of the first row.
Both arms – don’t chain 1 at the beginning
of the rows
49.) Stich 2 more, turn
50.) 26 sc, turn,
25 sc, turn…do the countdown until
you count 15 stiches
Turn and make 14 sc, FO and leave
a long tail to sew
Side – bottom – side – top
I sew the arm like this.
Curve it a bit , and stuff it firmly.
▫ EARS ▫
1 pair with main color, 1 pair with pink color
Chain 1 and turn in every row, we are making a
half circle
1.) 3 sc into a magic ring (3)
2.) 3inc (6)
3.) ( sc, inc ) * 3 (9)
4.) Sc, ( inc, 2 sc ) *2, inc, sc (12)
5.) ( 3sc, inc ) *3 (15)
6.) 2 sc, ( inc, 4 sc ) *2, inc, 2sc (18)
7.) ( 5sc, inc ) *3 (21)
8.) 3 sc, ( inc, 6 sc ) *2, inc, 3 sc (24)
9.) ( 7 sc, inc ) * 3 (27)
10.) 4 sc, ( inc, 8 sc ) *2, inc, 4 sc (30)
11.) ( 9 sc, inc ) *3 (33)
12.) 5 sc, ( inc, 10 sc ) *2, inc, 5 sc,
ch 1, turn
(36)
13.) 11 sc, inc, 5 sc, dec, ch1, turn
14.) Dec, 5 sc, inc, 9 sc, dec, ch1, turn
15.) Skip the first sc, 4 sc, inc, 5 sc, inc, 3
sc, dec, ch1, turn
16.) Dec, 5 sc, inc, 7 sc, dec, ch1, turn
17.) Dec, 5 sc, inc, 5 sc, dec, ch1, turn
18.) Dec, 9 sc, dec, ch1, turn
19.) Skip the 1 sc, 7 sc, dec, ch1, turn
20.) Skip the 1 sc, 5 sc, dec, ch1, turn
21.) 5sc, ch1, turn
22.) 4 sc, ch1, turn
23.) 3 sc, ch1, turn
24.) dec
FO the pinks, those will be the inner parts.
When you finish the outer ears, do not cut the yarn.
With the main color crochet together the two parts,
make increase at the corners.
And of course it`s up to you when you sew on the ears – I usually finish all the parts and then sew all
the pieces together.
Make a half heart and sew the ears on Start with the 1st sc of the inc on the corner of
the ear
▫ TAIL ▫
Start with with
1.) Magic ring with 6 sc (6)
2.) 6 sc (1 row)
3.) (sc, inc )*3 (9)
4.) 1 sc,( inc, 2 sc )*2, inc, 1 sc (12)
5.) ( 3 sc, inc )*3 (15)
6.) 2 sc, ( inc, 4 sc )*2, inc, 2 sc (18)
7.) ( 5 sc, inc )*3 (21)
8.) 3 sc, ( inc, 6 sc )*2, inc, 3 sc (24)
9.) ( 7 sc, inc )*3 (27)
10.) 4 sc, ( inc, 8 sc )*2, inc, 4 sc (30)
11.-18.) 30 sc (8 rows)
Change color to main color
19.) 30 sc (1 row)
20.-59.) 6 sc, FLO 15 sc, 9 sc (40 rows)
(this way a tail will bend a little bit,
after you fill it)
The front loops are at the right side, you can
see the difference between the stiches.
FO and a leave a tail to sew
I leave it to you how and where you will sew
on the tail – this is what it looks like from
above
▫ CHEEKS ▫ – body color, make 2
1.) 6 sc into a magic ring (6)
2.) 6inc (12)
3.) ( 1 sc, inc ) *6 (18)
4.) 1 sc, (inc, 2 sc)*5, inc, 1
sc
(24)
5-7.) 24 sc (3 rows)
8.) Stitch 12 more, cut the yarn and
leave a tail for sewing.
Don’t stuff them.
First, sew the 12 sc into the head.
You can see how I sew them on in the next
three pictures.
▫ EYES ▫ – with yellow
Make 5 chain and from the second sc ▫ PUPILS ▫
start with black, then green
Make a magic ring, than chain 3, make
1 dc – you have to have 2 loops now on
the hook, then make 1 more – it’s 3
loops now – and pull the yarn through
all the loops. Make 3 chains, stitch back
into the magic ring. Add the green yarn,
turn the work and make 3 sc into the
chains (wrong side of the work), 2 sc
into the top and 3 more sc on the other
side.
1.) Inc, 3 sc, ch 1, turn (5)
2.) 5 sc , ch1, turn (1 row)
3.) Inc, 4 sc, ch 1, turn (6)
4.-8.) 6 sc, ch1, turn (5 rows)
9.) Skip 1 sc, 3 sc, dec, ch1,turn (5)
10.) Skip 1 sc, sc, dec, ch1, turn (3)
11.) Slst into the next sc and FO
▫ Eyebrows ▫
Make 10 chains, slst into the
first, then 7 hdc, and slst
into the last chain. Leave a
tail for sewing.
▫ PATCH BETWEEN THE EYES ▫
– Light blue
Make 6 chains, and from the 2nd
1.) 5 sc, chain 1, turn (5)
2.) 2 sc, skip 1 and make 2sc (4)
3.-4.) 4 sc (2rows)
5.) Sc, inc, 2 sc (5)
6.) 5 sc (1 row)
7.) 2 sc, inc, 2 sc (6)
8.) 6 sc (1 row)
9.) 3 sc, inc, 2 sc (7)
10.) 7 sc (1 row)
Now you will make the ripples:
– Make 3 chains, 1 dc into the next sc,
make 3 chain, stitch into the next sc
– Make 3 chains, 2 treble into the next
sc – pull all 3 loops together, make 3
chains and stitch down into the next
sc
– Repeat the first sequence, but with
the last 3 chains slst into the last
stitch
▫ MUZZLE ▫ – with white
The muzzle, mouth, tongue and the black part of
the mouth
Make 14 chains, and from the 3rd sc from the
hook:
1.) 11 sc, 3 sc into the last one,
repeat it on the other side
(28)
3.) ( 11 sc, 3inc )*2 (34)
4.-7) 34 sc (4rows)
Leave a tail to sewing.
The muzzle’s upper side should be in the
same row where you sewed the eyes’ lower
parts.
There go the
3 sc at the
end of the 1st
row
▫ SMILING LIP ▫ – with white
Here you will join the rows at the end with
a slip stitch.
Make 28 chains, and from the 3rd chain:
1.) 25 sc, 3 sc into the last chain, 25
sc and 3 sc into the last chain
2.)
Chain 2 (does not count as a
stitch), 5 hdc,16 sc, 5 hdc, then
2*hdcinc, 25 hdc, 2*hdcinc, slst at
the end
3.) Sc around
FO and leave a tail for sewing.
▫ NOSE ▫ – with black yarn ▫ MOUTH ▫ – with red yarn
6-7 dc into a magic ring – I made 2 chains,
then 7 dc, and leave a tail to sew.
Same as the nose, but at the end, slip
stitch the 2 chains into the magic ring and
pull it tight.
Leave a tail to sew.
▫ BLACK PART ▫ of the mouth
Start with 10 chains, then you will make a
quadruple stitch 3 times into the 8th chain
from the hook. 6*triple treble into the next
chain and 1 quadruple into the last chain.
These stitches are similar to the double
crochet stitch, only yarn over the hook 4
or 5 times.
If this does not fit you, don’t worry, you can
maybe use felt, too. Just fill the area.
I placed the eyes and the patch
between row 120-121, but play a bit, choose what`s
best for you
Just right under the eyes, the upper part of the
muzzle should be in the same row as the eyes and
the patch (now the duck is ready, looks like a duck
right 😀 )
After you sew on the muzzle, don’t cut the yarn, or
with another piece of yarn of the same type, sculpt
the muzzle on, as in the picture.
You can stuff the lip a little bit.
You made a bunch of hdc`s in the second row –
that part is the lower part of the mouth
Black part, nose, lip, eyebrows
For the mustache I used a thinner yarn, I don’t
have the label, I used to make doilies with that
yarn.
Finally, you are ready!
You will start to join the two legs
Left legs 37 sc into the right legs 3rd sc
Than 38 into 2nd ans so on..
The green thread is my stitch marker.
Round 48 : as I mentioned above, you will have to stitch between the legs to,
where you joined the legs.
Here : you will see a U or a half circle –
or stitch there
Here : the arrow points the last stitch
of the previous round, the last stitch
where you joined the legs.
Same in the front .