
We will need:
– hook;
— incovolok;
— satin ribbon (brown);
– a little filler;
– sewing needle.
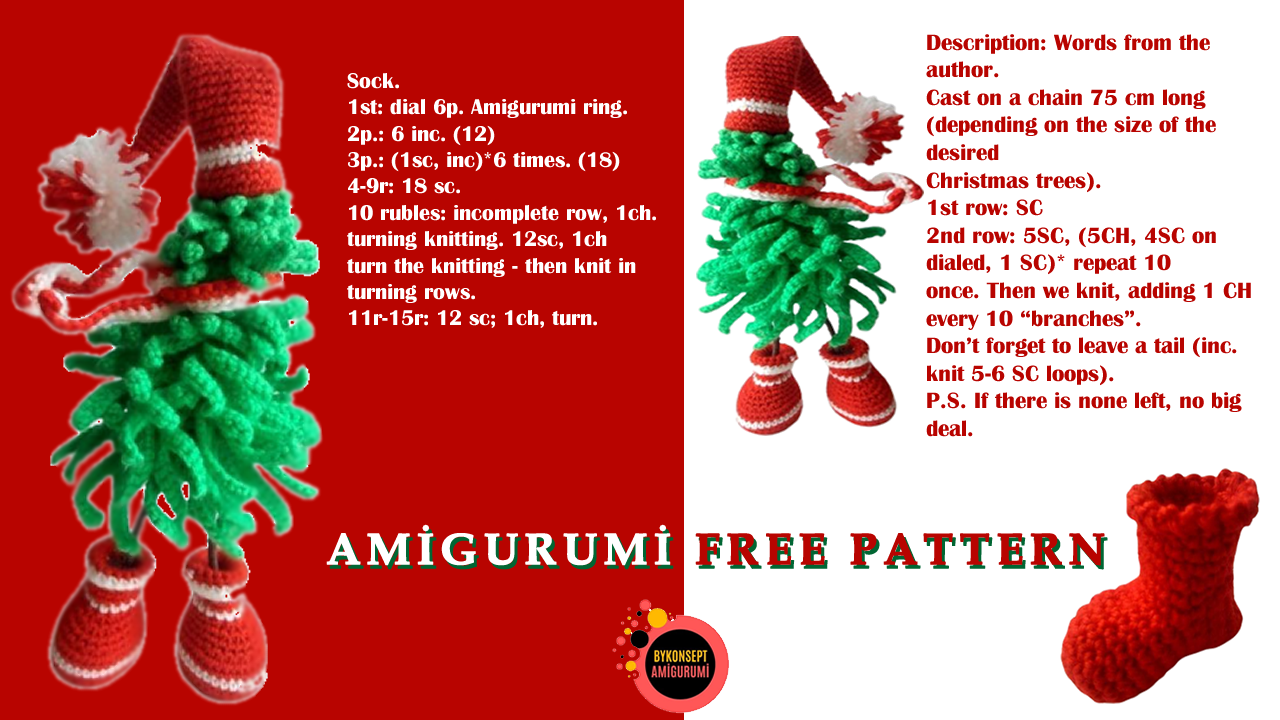
Description: Words from the author.
Cast on a chain 75 cm long (depending on the size of the desired
Christmas trees).
1st row: SC
2nd row: 5SC, (5CH, 4SC on dialed, 1 SC)* repeat 10
once. Then we knit, adding 1 CH every 10 “branches”.
Don’t forget to leave a tail (inc. knit 5-6 SC loops).
P.S. If there is none left, no big deal.
We secure the top of the workpiece and wrap it around the incline
spirals. We secure each turn. We wrap the barrel with satin
tape. You can wrap it with brown ink. cord with twine and
etc.
And with the left tail (if there is one left) we mask the joint of the tape
and inc.
At the base we make a loop from incovolok.
All that remains is to knit clothes for our Christmas tree. A sock or shoe.
Cap and scarf.
You can make a Christmas tree hands and knit mittens. Can be done
one or two legs.
Christmas tree is about 23cm tall
Christmas tree (the greenery itself):

1 row. We use the main color to create a chain of c. p. 75 cm long. ( I have
The thick knit was enough for me to be 50 cm, you can do less, it all depends on what
size you want the tree)
2nd row. In the second loop from the sc. hook, continue to the end of the chain;
3rd row. Turn and knit 5 sc. 5 ch. further into the second loop from
hook sc along a chain of ch, 4sc, 1sc – on the main chain itself
long, you have one branch, so we need to make 10
“twigs”, then 6 ch, return along the chain 5sc, -10 “twigs”, and. etc.
every 10 “branches” inc we add one ch and one sc. – etc., in
At the end, work 5sc.
Shoes (2 parts):
Use a red thread to tie a chain of 4 air. p. + 1 air. lifting point.
1 p.: 3 sc, 3 sc in the last air. p., then on the other side of chain 2
sc, inc, last stitch. Next, knit in circular rows. (10)
2 rubles: inc, 2 sc, 3 inc, 2 sc, 2 inc. (16)
3 rubles: 1 sc, 1 inc, 2 sc, 6 inc, 2 sc, 1 inc, 3 sc. (24)
4 p.: 1 inc, 8 sc, 1 inc, 4 sc, 1 inc, 8 sc, 1 inc.(28)
5 rubles: 2 sc, 1 inc, 7 sc, 1 inc, 2 sc, 2 inc, 2 sc, 1 inc, 10 sc (33)
6 r.: 33 sc. behind the back wall.
7 rub.: 33 sc. white
8-9 p.: 33 sc. Cut out a foot insert from cardboard along the contour
knitted oval and insert into the part.
10 p.: 2 dec, 9 sc, inc, knit 2 sts together 6 times, 8 sc,. (25)
11 rubles: 25 tbsp. b/n.
12 p.: 1 dec, 7 sc, inc, knit 2 sts together 4 times, 6 sc, 1 dec. (19)
13 r.: 6 sc, inc knit 2 sts together 4 times, 5 sc. (15) Stuff the part
filler
14 r.: 15 sc in white;
15 r.: 15 sc in red;
16 rubles: 1 inc. 14 sc;
17 r.: 16 sc
18 rubles: 1 inc, 15 sc
18r.: 17 sc;
19 rubles: 1 inc, 16 sc
20-21 p.: 18 sc. in white, ending with cm, inc thread.
Sock.
1st: dial 6p. Amigurumi ring.
2p.: 6 inc. (12)
3p.: (1sc, inc)*6 times. (18)
4-9r: 18 sc.
10 rubles: incomplete row, 1ch. turning knitting. 12sc, 1ch
turn the knitting – then knit in turning rows.
11r-15r: 12 sc; 1ch, turn.
16r.: 6sl-st, – so we are in the middle of the heel, fold it in half and either
outside or inside the heel we knit 6sl-st, for both parts, thereby tying them
together.

17 rubles: we finished in the middle of the heel, now we type sc in a circle and
knit up to the height you need.
We knit the last row of “chains” like this: 1ch, sl-st in sc ince of the previous row, etc.
to end
Mittens:
1r. 6inc (12)
2-5 r 12sc
6r. in the first loop 5SL-STН, 11 sc (12)
7r. 1sc, 5sc with common top (thumb), 10sc
8 r (2sc, dec) 3 times
9-10 r 9sc
and harness, if necessary

